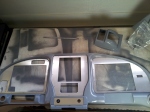
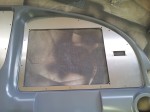
After being out of town for a couple of weeks, it was fun to get back to the build today. While I was gone I had ordered the instrument panel inserts from Front Panel Express and provided them with the shape and cut outs I needed. Their software was very easy to use, and while it does lack some features, it was easy enough to work with them to get a few shapes made up (special shapes for AFS for instance). I had these machined out of 2mm aluminum and I left them unfinished so I could ensure everything fit and finish them properly.
I started by ensuring the inserts fit the cutout properly and they did indeed fit nicely in place. Next I attached the carbon fiber panel to the instrument console and then match drilled the insert screw holes into the carbon fiber console as well as the metal support structure. Thanks to the printed template I used before ordering there was no conflicting screw holes!
The holes that allow the AFS EFIS screens to attach to the inserts don’t line up with the metal support frame, so another way to attach the screen was needed. Rather than mess with nuts behind the panel, or to allow nutplates to mar the finish of the insert, I found some self-clinching nuts (http://www.mcmaster.com/#self-clinching-nuts/=jlx6el) that act as a permanently attached nut. These are pressed into the aluminum and during the process the soft aluminum cold flows around the nut and holds it permanently. I used my pneumatic squeezer to do this and they worked nicely. I was lucky enough to get a few of these from a local builder Roy Thoma, thanks Roy!
Next up I drilled and installed nutplates in the metal support frame for the inserts. I also had to trim some of the frame to enable components to fit in their locations. The left side required some trimming for each of the three components that were installed.
I added the ACK ELT-E04 remote control panel to the right side insert. I didn’t have the spacing right on the holes I had drilled, I should have left these off the order as I had to measure and place them myself. The drawing specifications seem to be off. So I wound up drilling the holes up from a #4 to a #6 and it worked then. I also drilled a 1/2″ hole and installed the flap switch I got from AeroSport Products. It has a anti-rotation washer and a lock washer so I need to find the right order for those to go on.
Lastly I clamped the Garmin GTN750 GPS system and the PS-Engineering PAR100EX audio panel/radio mounting trays together and aligned with the center panel insert. The mounting trays aren’t connected to the panel itself, instead they are attached to mounting rails (aluminum angle) which is secured to the metal sub-frame itself. I then turned the panel right side up to get the obligatory shots. It really is starting to look like an instrument panel!


